Removing old carpet might seem like a daunting task, but with the right tools and a step-by-step approach, it’s easier than you think. Whether you’re upgrading to hardwood, tile, or a fresh new carpet, getting rid of the old flooring is the first step in transforming your space. The process involves more than just ripping up carpet—it requires proper planning, safe handling, and responsible disposal.
Carpet removal is often the first step in giving a space a fresh new look. Whether you’re upgrading to hardwood or tile, replacing worn-out carpeting, or tackling a home renovation project, knowing how to remove old carpet properly can save you time and money. Over time, carpets can trap dirt, allergens, and odors, making removal a smart choice for anyone looking to create a cleaner, healthier living environment.
Before jumping in, proper preparation is key. Carpet removal can get messy, and without the right approach, you might run into challenges like stubborn staples, glued-down padding, or damaged subfloors. By having a clear plan in place, you can avoid common mistakes and make the process as smooth and efficient as possible. Safety should also be a top priority—wearing gloves, knee pads, and a dust mask can help protect against dust, allergens, and sharp edges.
From prepping the room and cutting the carpet into manageable sections to dealing with stubborn staples and adhesives, we’ll cover everything you need to know.
Why Remove Carpet?
There comes a time when every carpet reaches the end of its lifespan. Whether it’s due to wear and tear, style changes, or health concerns, removing old carpet is often the first step in refreshing your space. While carpet can be cozy, it also traps dirt, allergens, and odors over time, making removal a smart choice for homeowners looking for a cleaner, more modern look.
Upgrading to Hardwood, Tile, or Laminate Flooring
One of the biggest reasons people remove carpet is to switch to hardwood, tile, or laminate flooring. These alternatives are not only easier to clean and maintain, but they also provide a sleek, updated appearance that can boost a home’s value. Hard surfaces are particularly great for high-traffic areas and households with pets or allergies.
Dealing with Stained, Worn-Out, or Old Carpet
Over time, carpets can become stained, matted, or faded, especially in areas with heavy foot traffic. Even with regular cleaning, dirt and moisture can build up, leading to permanent damage. If your carpet has stubborn stains, frayed edges, or visible wear, it may be time to pull it up and start fresh.
Reducing Allergies and Dust Accumulation
Carpet acts like a giant air filter, trapping dust, pet dander, pollen, and allergens deep within its fibers. Even with frequent vacuuming, allergens can settle beneath the surface, causing irritation for those with asthma or allergies. Removing carpet and replacing it with a hard flooring option can significantly improve indoor air quality.
Preparing a Home for Sale or Rental
If you’re planning to sell or rent out your home, replacing old carpet can make a huge difference in attracting buyers or tenants. Fresh flooring creates a more modern, well-maintained appearance, making the space feel cleaner and more inviting. Many buyers today prefer hardwood or tile over carpet, so making the switch can increase the value and appeal of your property.
Tools You’ll Need for Carpet Removal
Before you start ripping up your old carpet, it’s important to have the right tools on hand. Using the proper equipment will make the process easier, safer, and more efficient. Here’s a list of must-have tools to help you tackle carpet removal like a pro.
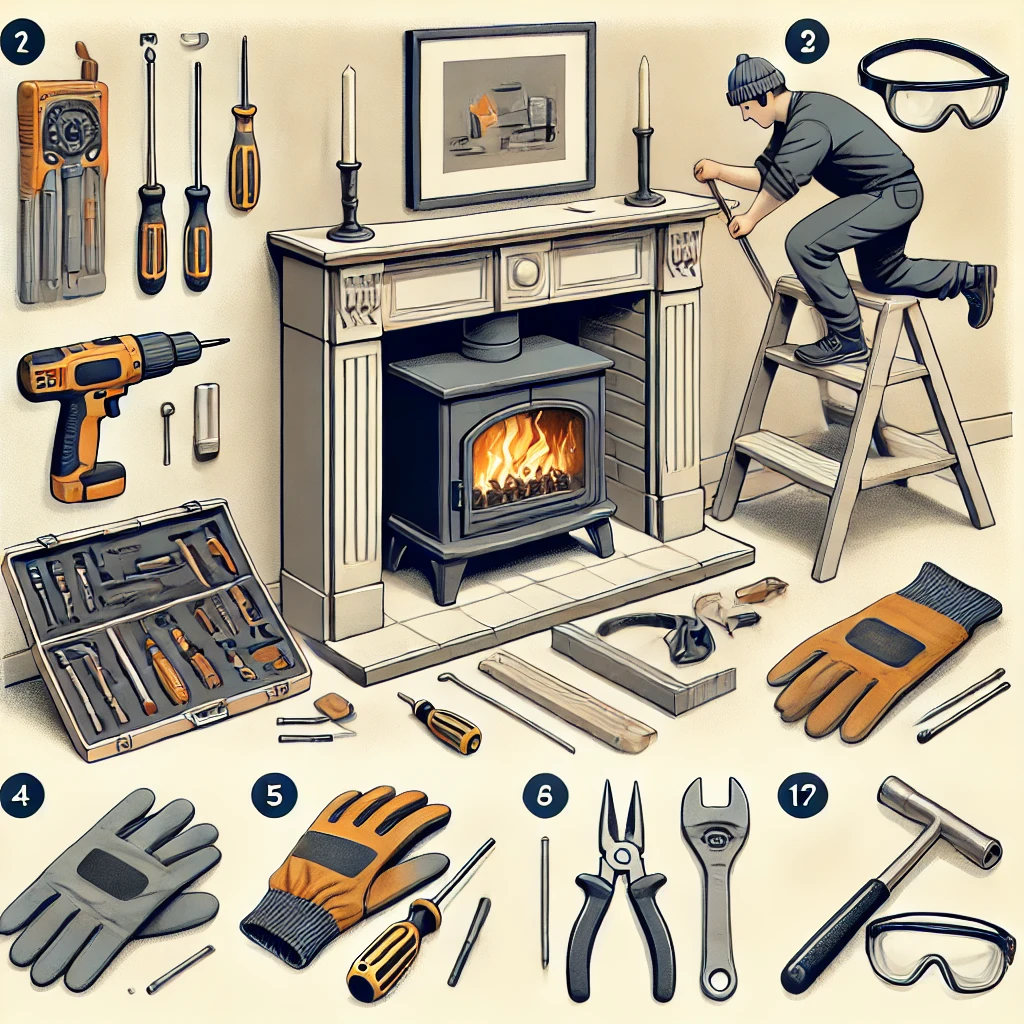
Essential Tools for Carpet Removal
✔ Utility Knife – A sharp utility knife is essential for cutting carpet into smaller, manageable sections. This makes it easier to roll up and remove.
✔ Pry Bar – This tool is great for lifting tack strips and prying up carpet edges that are nailed or stapled down.
✔ Pliers – Use pliers to grip and pull out stubborn staples or nails that hold the carpet and padding in place.
✔ Work Gloves – Carpet edges and tack strips can be sharp, so wearing gloves will protect your hands from cuts and splinters.
✔ Knee Pads – Carpet removal requires a lot of bending and kneeling. Knee pads will save your joints and make the process much more comfortable.
✔ Dust Mask – Carpets trap dust, allergens, and debris, which can be released into the air when removed. Wearing a dust mask will help protect your lungs.
✔ Heavy-Duty Trash Bags – Once the carpet is removed, you’ll need strong, tear-resistant trash bags to contain the discarded material for disposal.
✔ Duct Tape – Wrap up sections of carpet and padding with duct tape before carrying them out. This keeps everything secure and prevents mess.
✔ Floor Scraper – If your carpet padding was glued down, you may need a floor scraper to remove leftover adhesive from the subfloor.
Having these tools ready before you start will make the job go smoothly and prevent unnecessary delays.
How to Prepare the Room Before Carpet Removal
Before you start pulling up your carpet, proper preparation is key. Taking a few minutes to set up your workspace will make the process safer, cleaner, and more efficient. Here’s what you need to do before getting started.
Move All Furniture and Clear the Space
Carpet removal requires a clear, open area to work in. Start by removing all furniture, rugs, and decor from the room. If heavy items can’t be moved out, push them to one side and cover them with a sheet to protect against dust. Having a clutter-free space will prevent obstacles and make the job much easier.
Wear Safety Gear to Protect Against Dust and Allergens
Carpets trap dust, allergens, pet hair, and debris over time. When you start pulling it up, those particles will be released into the air. To protect yourself, wear a dust mask, gloves, and knee pads. This will help prevent respiratory irritation, hand injuries from sharp staples, and discomfort from kneeling on the floor.
Check for Tack Strips, Nails, and Adhesives
Once the room is cleared, inspect the edges of the carpet and flooring for tack strips, nails, or glue residue. Tack strips are wooden strips with sharp nails used to hold the carpet in place. If you’re not careful, they can cause injuries when stepping or kneeling near them. Make a note of any stubborn adhesives or fasteners that may need extra effort to remove later.
By properly preparing your space, you’ll set yourself up for a smoother, hassle-free carpet removal process. Now that your room is ready, it’s time to start pulling up that old carpet!
How to Remove Carpet in 10 Easy Steps
Removing old carpet might seem like a tough job, but breaking it down into simple, manageable steps makes it much easier. Follow these 10 steps to safely and efficiently remove your carpet without damaging the floor underneath.
1. Start at a Corner
Begin by choosing a corner of the room to start. Use pliers or a pry bar to grip the carpet and pull it up from the tack strips along the edge. If it’s stubborn, use a utility knife to cut a small section free. Once you get a good grip, pull up enough carpet to work with comfortably.
2. Cut the Carpet into Sections
Carpet can be bulky and difficult to handle in large pieces. Using a sharp utility knife, cut the carpet into manageable strips, about 2-3 feet wide. This makes it much easier to roll up and carry. Make sure to cut from the back of the carpet where the backing is softer and easier to slice through.
3. Roll Up Each Section
After cutting, roll up each strip tightly to make it easier to move. Secure the rolled sections with duct tape to keep them from unrolling while you carry them out. This also helps prevent dust and fibers from spreading around your home.
4. Remove Carpet Padding
Once the carpet is out, you’ll need to remove the padding underneath. If it’s stapled to the floor, simply pull it up. If it’s glued down, use a floor scraper to carefully loosen and remove the adhesive. Like the carpet, cut the padding into smaller sections for easy handling.
5. Remove Tack Strips
Tack strips are thin wooden strips with sharp nails that hold the carpet in place. Using a pry bar or hammer, gently lift each strip away from the subfloor. Be careful—these strips have sharp edges that can easily cut you. If you’re planning to install new carpet, you may want to leave the tack strips in place if they’re still in good condition.
6. Pull Out Staples and Nails
After removing the carpet padding, inspect the floor for staples and nails left behind. Use pliers or a flathead screwdriver to pull them out. This step is crucial for preparing the floor for new flooring installation.
7. Check for Adhesive Residue
If your carpet was glued down, there may be sticky adhesive residue left behind. Use a floor scraper or adhesive remover to get rid of any remaining glue. This ensures a clean and even surface for your new flooring.
8. Inspect the Subfloor
With everything removed, take a moment to inspect the subfloor. Look for signs of damage, mold, or uneven areas that may need repairs before installing new flooring. Fixing these issues now will save you trouble later.
9. Clean the Floor Thoroughly
Before moving on, sweep, vacuum, and mop the entire floor to remove dust, dirt, and debris. A clean surface is essential for a smooth flooring installation.
10. Dispose of Old Carpet Properly
Now that your carpet is removed, decide how to dispose of it responsibly. Consider these options:
✔ Recycling: Some carpet materials can be recycled—check with a local recycling center.
✔ Donation: If the carpet is still in decent condition, some organizations may accept it.
✔ Professional Disposal: Junk removal services can haul away old carpet for proper disposal.
And that’s it! By following these 10 simple steps, you can remove carpet efficiently and prepare your space for its next transformation.
How to Remove Carpet Padding
Once the carpet is gone, the next challenge is removing the padding underneath. While carpet padding is usually lightweight, it can be tricky to remove—especially if it’s glued down or full of stubborn staples. Let’s go step by step to ensure a smooth removal process.
Removing Glued-Down Carpet Padding
If your padding is glued to the subfloor, you’ll need a little extra effort to get it up. Follow these steps:
- Start at a Loose Edge – Use a putty knife or floor scraper to lift a corner of the padding.
- Peel and Scrape in Sections – Work in small sections, slowly peeling up the padding while using a scraper to loosen any stuck areas.
- Use a Heat Gun or Warm Water – If the glue is particularly stubborn, apply heat with a heat gun or pour warm water on the adhesive to soften it before scraping.
- Apply an Adhesive Remover (If Needed) – If residue remains, use a safe adhesive remover to break down the glue and wipe it away with a cloth.
How to Deal with Stuck Staples and Adhesive Residue
Staples and leftover adhesive can make the floor uneven and difficult for new flooring installation. Here’s how to tackle them:
✔ Pulling Out Staples: Use pliers or a flathead screwdriver to pry up staples one by one. If there are a lot, a floor scraper or staple remover can speed up the process.
✔ Scraping Off Adhesive Residue: A floor scraper or putty knife works best to remove any dried glue left behind.
✔ Sanding for a Smooth Finish: If the floor still feels rough, use a sanding block or orbital sander to smooth out any stubborn patches.
Final Check Before Moving Forward
Once the padding is fully removed:
- Inspect the subfloor for any signs of mold, water damage, or uneven areas.
- Vacuum and wipe down the floor to remove dust and debris.
- Let the floor dry completely if you used any liquids for adhesive removal.
With the padding gone and the floor clean and smooth, you’re now ready for the next step—whether it’s installing new flooring or giving your space a fresh look.
Disposal Options for Old Carpet
Once you’ve removed your old carpet and padding, the next step is figuring out how to dispose of it responsibly. Dumping it in a landfill might seem like the easiest option, but there are better, more eco-friendly ways to handle old carpet disposal. From recycling and donations to professional junk removal services, here are your best options.
Recycling: Where and How to Recycle Old Carpet
Carpets are made from a mix of materials, including plastics, fibers, and adhesives, many of which can be recycled instead of ending up in landfills. Here’s how to find recycling options near you:
✔ Check Local Recycling Centers – Some facilities accept old carpets, especially if they separate fibers for reuse. Visit Earth911 or Carpet America Recovery Effort (CARE) to find carpet recycling locations.
✔ Contact Carpet Manufacturers – Some brands, like Mohawk and Interface, offer carpet take-back programs to recycle old materials into new flooring products.
✔ Curbside Pickup Services – Some cities offer bulk waste recycling days where carpets are collected for proper disposal. Call your local waste management office to check.
Recycling helps reduce landfill waste and repurpose materials, making it one of the most sustainable ways to dispose of old carpet.
Donating Usable Carpet: Give It a Second Life
If your carpet is still in good condition—meaning no major stains, rips, or odors—it might be useful to someone else. Consider donating it to:
✔ Local Charities or Nonprofits – Organizations like Habitat for Humanity ReStores, Goodwill, and The Salvation Army may accept carpet donations if they’re clean and reusable.
✔ Community Centers or Schools – Some schools, daycare centers, or shelters might need carpets for play areas or insulation purposes.
✔ Online Giveaways – List your carpet for free pickup on Craigslist, Facebook Marketplace, or Freecycle. Many DIYers or renters look for cheap flooring solutions.
Donating is a great way to extend the life of your carpet while helping someone in need!
Junk Removal Services: When to Hire a Professional
If recycling or donating isn’t an option, junk removal services can handle large carpet removal jobs with minimal hassle. Here’s when hiring a professional makes sense:
✔ You Have a Large Amount of Carpet – If you’re removing multiple rooms of carpet, professionals can haul it away in one trip.
✔ You Don’t Have the Means to Transport It – Carpet rolls are bulky and heavy, making them difficult to move without a truck. Junk removal teams handle the heavy lifting for you.
✔ You Need a Fast, Stress-Free Solution – If you’re on a tight timeline, hiring a removal service ensures quick and proper disposal.
Many junk removal companies also prioritize recycling and sustainable disposal methods, so you can rest easy knowing your carpet won’t just end up in a landfill.
Which Option is Best for You?
Your disposal method depends on the condition of the carpet and your local options. If possible, recycling or donating is the most environmentally friendly choice. If those aren’t feasible, junk removal services can help clear everything out efficiently.
No matter which route you take, disposing of your old carpet responsibly makes a difference. Now that the old flooring is gone, it’s time to clean and prep the space for something new!
How to Clean and Prepare the Floor for New Flooring
Now that the old carpet is gone, it’s time to prepare the floor for your new flooring. Whether you’re installing hardwood, tile, laminate, or new carpet, a clean and level subfloor is essential for a smooth and long-lasting installation. Here’s how to get your floor in top shape before laying down new materials.
Removing Dust and Debris
Carpet removal often leaves behind a surprising amount of dust, dirt, and leftover fibers. Before moving forward, take the time to:
✔ Sweep thoroughly – Use a stiff broom to remove loose debris from the entire floor.
✔ Vacuum with a shop vac – A high-powered vacuum helps pick up fine dust, staples, and carpet fibers.
✔ Wipe down the surface – If you’re working with a wood or concrete subfloor, use a damp mop or cloth to remove any remaining dust.
✔ Check corners and edges – Dirt often accumulates along walls and under baseboards, so make sure to clean those areas too.
A clean subfloor ensures a strong bond between the new flooring material and the surface beneath it.
Checking the Subfloor for Damage
Before installing anything new, inspect the subfloor for any signs of damage. Look for:
✔ Cracks or Gaps – Small cracks in concrete subfloors should be filled with patching compound.
✔ Warping or Soft Spots – Wood subfloors should feel solid underfoot—if you notice sagging, water damage, or mold, those issues need to be addressed first.
✔ Leftover Staples and Nails – Run your hand over the floor and remove any leftover staples, nails, or glue residue that could interfere with new flooring.
Fixing these issues now will prevent bigger problems down the road and ensure a smooth installation process.
Repairing Any Dents, Cracks, or Uneven Surfaces
If you’ve spotted problem areas, take the time to fix them before moving forward:
✔ Fill in cracks or gaps – Use a floor patching compound to level out small cracks or holes in the subfloor.
✔ Sand down rough spots – If your subfloor has bumps or uneven patches, a sanding block or power sander can help smooth things out.
✔ Replace damaged sections – If you find rotting wood or severely damaged subfloor panels, they may need to be replaced before installing new flooring.
Final Step: Double-Check Everything!
Before installing your new flooring, do a final walk-through of the space:
✔ Is the surface completely clean?
✔ Are all nails, staples, and adhesive residues removed?
✔ Is the subfloor level and free from major imperfections?
If the answer is yes, you’re ready to move forward with your new flooring! Proper preparation ensures a flawless installation and extends the lifespan of your new floors.
With the floor cleaned and prepped, it’s time for the final decision—installing your fresh flooring!
DIY vs. Hiring a Professional for Carpet Removal
When it comes to removing carpet, you have two choices: do it yourself or hire a professional. Each option has its benefits and challenges, so the best choice depends on your budget, time, and physical ability. Let’s break down the pros and cons of each approach so you can make an informed decision.
DIY Carpet Removal: Is It Worth It?
Pros of DIY Carpet Removal
✔ Cost Savings – The biggest advantage of removing carpet yourself is saving money on labor costs. Professional carpet removal services can get expensive, so if you’re on a budget, DIY is a great option.
✔ Work at Your Own Pace – You have complete control over the process, allowing you to remove carpet in stages if needed.
✔ Satisfaction of Doing It Yourself – There’s something rewarding about tackling a home improvement project on your own. Plus, you’ll learn valuable skills along the way!
Cons of DIY Carpet Removal
✘ Time-Consuming – Depending on the size of the space, carpet removal can take several hours or even days.
✘ Physically Demanding – Pulling up carpet, removing tack strips, and dealing with adhesive requires bending, lifting, and kneeling for long periods. If you have back or knee issues, it can be tough on your body.
✘ Proper Disposal is Your Responsibility – Once the carpet is removed, you’ll need to figure out how to dispose of or recycle it, which can be a hassle without access to proper facilities.
When to Call a Professional
DIY carpet removal works well for small areas with easy-to-remove carpet, but there are situations where hiring a professional is the smarter move.
Consider calling a professional if:
✔ You’re removing carpet from large rooms or multiple floors – Professionals can remove carpet faster and more efficiently, especially in big spaces.
✔ Your carpet is glued down – If you’re dealing with a glued-down carpet or stubborn adhesive, removal can be extremely difficult without specialized tools.
✔ You don’t want to deal with heavy lifting – Carpet removal can be physically exhausting, and professionals can handle the heavy work for you.
✔ You need fast, hassle-free removal – If you’re on a tight deadline, professionals can clear out the carpet quickly and even take care of disposal.
Which Option is Right for You?
If you’re comfortable with a bit of hard work and want to save money, DIY carpet removal is a great option. But if you’re dealing with large areas, glued-down carpet, or physical limitations, hiring a professional will make the process much easier and stress-free.
No matter which route you take, the goal is the same—removing your old carpet efficiently so you can move forward with your new flooring!
FAQ Section: Carpet Removal
What is the easiest way to remove carpet?
The easiest way to remove carpet is to start at a corner and use pliers or a pry bar to lift it up. Once you have a good grip, cut the carpet into manageable strips (about 2-3 feet wide) using a utility knife. This makes it easier to roll up and remove. If the carpet is stapled or glued down, use a floor scraper to loosen stubborn spots.
How long does it take to remove carpet?
The time it takes to remove carpet depends on the size of the space and the difficulty of the removal process. For a standard-sized room (10×12 feet), DIY carpet removal typically takes 2-3 hours. If the carpet is glued down or if there are a lot of staples to remove, it could take longer. Professionals can usually complete the job much faster.
Can I remove carpet without damaging the subfloor?
Yes! If you take your time and use the right tools, you can remove carpet without damaging the subfloor. Avoid using excessive force when pulling up carpet, tack strips, or staples. If there’s glue residue, use a floor scraper or adhesive remover instead of aggressively scraping to avoid gouging the subfloor.
Should I remove tack strips if I’m installing new carpet?
It depends. If your tack strips are still secure and in good condition, you can leave them in place for the new carpet installation. However, if they are old, broken, or rusted, it’s best to remove and replace them.
What should I do if I find mold under my carpet?
If you discover mold under your carpet, don’t ignore it! Mold can spread quickly and affect indoor air quality. Here’s what to do:
✔ Wear protective gear (gloves, mask) to avoid breathing in mold spores.
✔ Remove and dispose of the affected carpet immediately.
✔ Clean the subfloor with a mixture of water and white vinegar or a mold-killing solution.
✔ Allow the area to dry completely before installing new flooring to prevent future mold growth.
If the mold is widespread or deeply embedded in the subfloor, consider calling a professional for mold remediation.
Can old carpet be recycled?
Yes! Many carpets can be recycled instead of ending up in a landfill. Some manufacturers have take-back programs, and many recycling centers accept carpet materials. You can check with Carpet America Recovery Effort (CARE) or visit Earth911 to find recycling locations near you. If recycling isn’t an option, donating carpet in good condition is a great alternative.